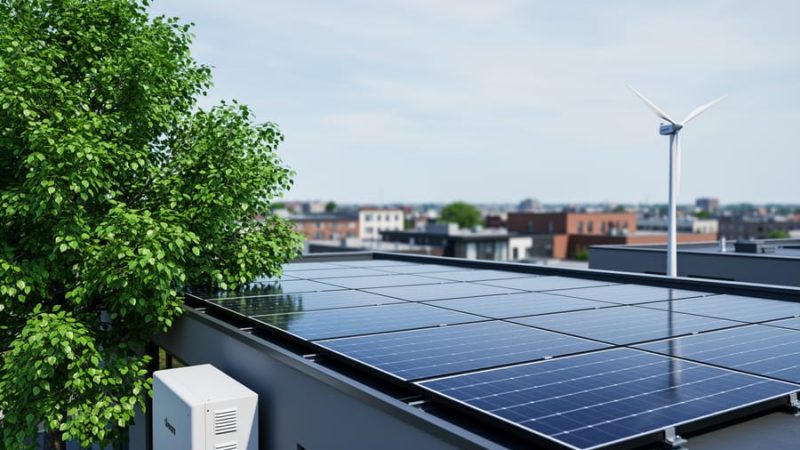
How to Set Up a Solar Home System Off Grid: Step-by-Step Installation for Energy Independence
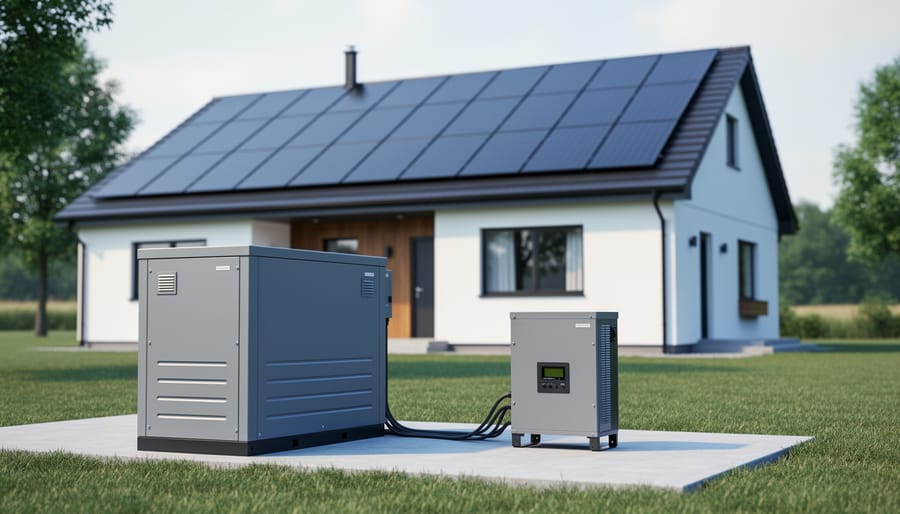
Installing a complete off-grid solar home system requires three core components working together: solar panels to capture energy, batteries to store it, and an inverter to convert it into usable household power. Most homeowners can complete a basic 3-5 kilowatt installation in three to five days with moderate DIY skills, though the planning phase often takes several weeks to get right.
Going off-grid means cutting ties with your utility company entirely. Your solar array becomes your only power source, so sizing your system correctly from the start is critical. Undersize it, and you’ll spend cold winter nights without power. Oversize it, and you’ve wasted thousands of dollars on capacity you’ll never use.
Pennsylvania homeowners have been leading the charge in off-grid adoption, driven partly by the desire to protect waterways from the pollution of conventional power generation. Rural counties especially have seen a 40 percent increase in off-grid installations since 2024, as residents recognize the connection between energy independence and reducing their climate change impact.
The technology has matured dramatically. Battery costs have dropped by half in the past five years, and modern lithium iron phosphate batteries last 15 years or more with minimal maintenance. Solar panels now convert over 22 percent of sunlight into electricity, compared to 15 percent a decade ago.
This guide walks you through every step, from calculating your actual power needs to mounting your final panel and flipping the switch. You’ll learn which components matter, which don’t, and how to avoid the expensive mistakes that trip up first-time installers.
What You Need Before Starting: System Components and Tools
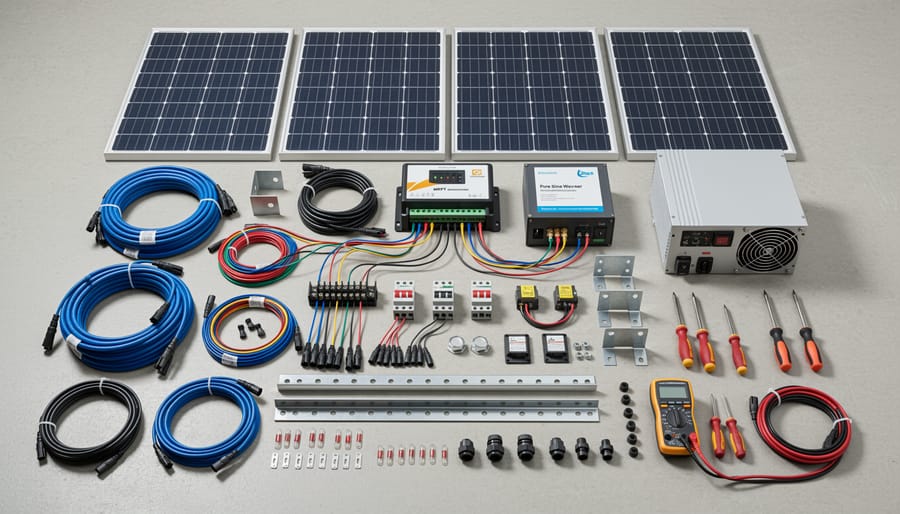
Sizing Your System for Your Energy Needs
Sizing your off-grid solar system correctly prevents both wasted money on oversized equipment and the frustration of running out of power. Start by listing every appliance and device you plan to run, noting its wattage and how many hours per day you’ll use it.
Your refrigerator might draw 150 watts and run 8 hours daily (1,200 watt-hours). LED lights total 60 watts for 5 hours (300 watt-hours). A laptop uses 50 watts for 4 hours (200 watt-hours). Add everything up to get your total daily consumption in watt-hours. A typical small off-grid home uses 3,000-5,000 watt-hours daily, while larger households with more appliances might need 8,000-12,000 watt-hours.
Once you know your daily needs, size your solar array to produce that amount plus extra for cloudy days and winter sun angles. In Pennsylvania, count on about 3.5-4 peak sun hours daily on average. Divide your daily watt-hours by peak sun hours to find minimum array size. If you need 5,000 watt-hours and get 4 peak sun hours, you need at least 1,250 watts of panels (5,000 ÷ 4 = 1,250).
Your battery bank stores power for nighttime and cloudy periods. Most off-grid homes need 2-3 days of backup capacity. Multiply your daily watt-hours by days of autonomy you want, then divide by your battery voltage (typically 24V or 48V). For 5,000 watt-hours daily with 3 days backup at 48V: (5,000 × 3) ÷ 48 = 312.5 amp-hours minimum. Factor in depth of discharge limits, lithium batteries safely use 80-90% capacity while lead-acid should only discharge 50%, so double the lead-acid bank size to 625 amp-hours.
Safety First: Critical Precautions and Permit Requirements
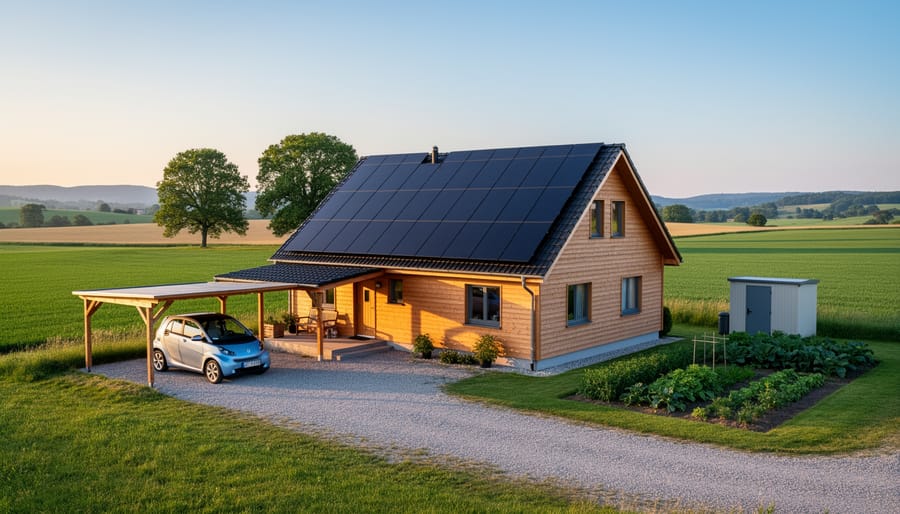
Before you climb onto your roof with a drill and a dream of energy independence, understand this: installing an off-grid solar system involves serious electrical and physical hazards that can injure or kill you if not approached with proper precautions. This isn’t a weekend DIY project to tackle lightly, it requires careful planning, respect for local regulations, and honest assessment of your skills.
Working with solar panels means dealing with high-voltage direct current (DC), which behaves differently than the AC power in your home outlets. DC voltage can sustain an arc across a gap, making it more dangerous than AC in some situations. Even a small solar array produces enough voltage and current to deliver a fatal shock, especially when panels are wired in series. Always assume your system is live when the sun is shining; there’s no “off switch” for solar panels receiving sunlight.
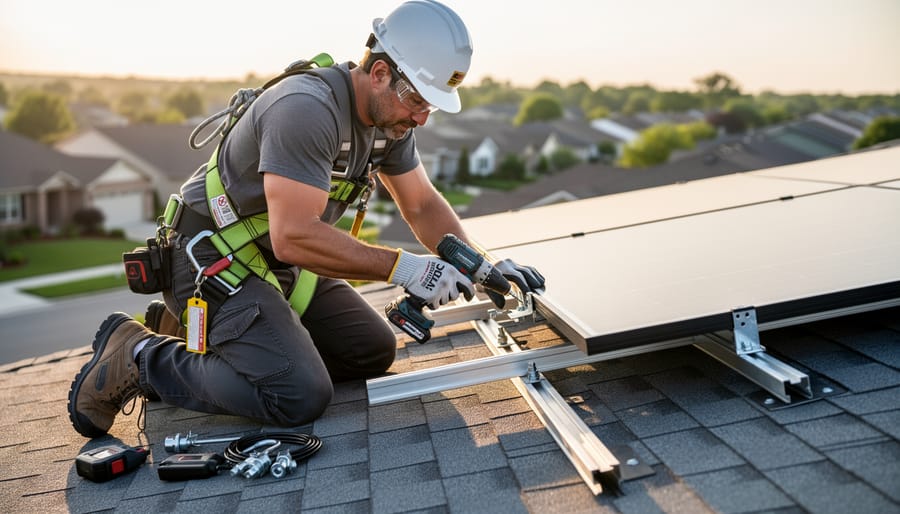
Height safety matters just as much as electrical safety. Roof work accounts for thousands of injuries annually, and you’ll be up there multiple times carrying heavy panels and equipment. Use proper fall protection, harnesses, anchor points, and guardrails aren’t optional luxuries. Work with a partner who can call for help if something goes wrong, and never install panels in wet, windy, or icy conditions.
Battery banks present their own hazards beyond electrical shock. Lead-acid batteries release hydrogen gas during charging, which is highly explosive in enclosed spaces. Lithium batteries can catch fire if damaged, overcharged, or improperly connected. Install batteries only in well-ventilated areas away from ignition sources, and wear eye protection and gloves when working around battery terminals, a battery short can spray molten metal.
Pennsylvania requires permits and inspections required for most solar installations, even off-grid systems not connected to the utility. Your local building department needs to verify your installation meets the National Electrical Code and structural requirements before you can legally operate the system. Skipping permits doesn’t just risk fines; it can void your homeowner’s insurance and make your home harder to sell.
Schedule an electrical inspection before you connect your inverter to your home’s circuits. The inspector will verify proper grounding, correct wire sizing, appropriate overcurrent protection, and safe battery installation. This isn’t bureaucratic hassle, it’s a professional check that could save your life or your home.
Step-by-Step Installation Process
Step 1: Assess Your Site and Plan Panel Placement
Start by walking your property with a compass and notepad on a clear day around noon. You’re looking for the spot that receives the most unobstructed sunlight throughout the day, typically a south-facing roof section or open ground area that stays sunny from roughly 9 AM to 3 PM.
For roof installations, examine the structural condition carefully. Look for sagging, damaged shingles, or rot. Your roof needs to support the added weight of panels, usually 2-4 pounds per square foot, for decades. If your roof needs replacement within five years, do that first.
Check for shade patterns by observing your site at different times. Trees, chimneys, and neighboring buildings cast shadows that shift with the seasons. A shadow that seems minor in summer might cover your panels completely in winter when the sun sits lower. Use a simple trick: photograph your site from where panels will go at 10 AM, noon, and 2 PM.
The ideal panel tilt in Pennsylvania equals your latitude, around 40 degrees, but anything between 30-45 degrees works well. South-facing captures maximum annual sun, though southeast or southwest orientations lose only 10-20 percent efficiency.
Mark your planned mounting points with chalk or tape once you’ve confirmed the location stays shadow-free.
Step 2: Install Mounting Hardware and Racking
Start by identifying the rafter or beam locations where your mounts will attach. For roof installations, use a stud finder or tap method to locate solid framing members, never mount into just sheathing or shingles. Mark each mounting point, ensuring your layout creates a level plane for the panels.
Drill pilot holes carefully, applying flashing tape around each penetration before inserting lag bolts. This prevents water infiltration. Install stainless steel lag bolts (typically 5/16″ × 3″) through the mount base directly into rafters, driving them until snug but not over-tightened. Apply roofing sealant generously around each mount base, then reinstall the shingle or roofing material over the flashing to maintain the roof’s water-shedding layers.
For ground mounts, dig post holes to below your frost line (48 inches deep in most of Pennsylvania), set galvanized steel posts in concrete, and allow 48 hours for curing. Use a level and string line to ensure posts are plumb and aligned.
Attach horizontal rails to the mounts, checking level in both directions. Your racking must be square and rigid, any twist or sag will stress panel frames and connections over decades of use.
Step 3: Mount and Wire the Solar Panels
With your racking securely installed, you’re ready to mount the panels themselves. Start by lifting each panel onto the racking, get a helper for this, as panels are awkward and typically weigh 40-50 pounds. Position the panel so its mounting holes align with the mid-clamps or end-clamps on your rails. Secure with stainless steel bolts, tightening just enough to hold firmly without crushing the frame. Leave a small gap between adjacent panels for thermal expansion.
Now comes the electrical connection. Most solar panels use MC4 connectors, weatherproof snap-together plugs that join positive to negative between panels. For series wiring (which increases voltage), connect the positive lead from one panel to the negative lead of the next. Continue this chain across your array. For parallel wiring (which increases amperage), you’ll need MC4 branch connectors to join all positive leads together and all negative leads together. Check your charge controller specs to determine which configuration matches your system voltage.
Once panels are wired, run the final array cables through weatherproof conduit down to your system location. Secure conduit to prevent damage from weather or animals, and ensure it enters your building through a properly sealed penetration to keep water out.
Step 4: Set Up the Battery Bank
Your battery bank stores the energy your solar panels collect, so proper installation is critical for both safety and performance. Start by selecting a location that maintains temperatures between 50-80°F year-round, batteries lose capacity in extreme cold and degrade faster in heat. The space must have ventilation to prevent hydrogen gas buildup, especially with flooded lead-acid batteries.
Before connecting batteries, verify they’re all the same age, type, and capacity. Never mix old and new batteries. For a 12V system, connect batteries in parallel (positive to positive, negative to negative) to increase amp-hours while maintaining voltage. For 24V or 48V systems, first create series strings to reach your target voltage, then parallel those strings if you need more capacity.
Use cables sized for your maximum current draw, undersized wires create dangerous heat and voltage drop. A 200Ah battery bank with a 3000W inverter needs at least 2/0 AWG cable. Install a fuse or circuit breaker rated for 125% of maximum current between batteries and charge controller. This protects against shorts that could start fires.
Tighten all connections firmly and coat terminals with anti-corrosion spray. Double-check polarity before energizing the system.
Step 5: Install the Charge Controller
The charge controller is your system’s brain, preventing overcharging that damages batteries and ensuring efficient energy harvest from your panels. Mount it on a wall near your battery bank in a dry, ventilated location where you can easily read the display and access controls.
Start by securing the controller to the wall with appropriate fasteners. Wire runs should be as short as practical to minimize voltage drop. Connect the battery terminals first, this powers up the controller and establishes the system voltage. Use appropriately sized cables with ring terminals, ensuring correct polarity (red to positive, black to negative). Tighten connections firmly but don’t overtorque.
Next, connect your solar array to the controller’s PV input terminals, again respecting polarity. The controller will now regulate charging automatically.
Configure the settings for your specific battery chemistry, flooded lead-acid, AGM, gel, or lithium batteries each require different charging profiles. Consult your battery manufacturer’s specifications for proper voltage setpoints. Most modern controllers have preset profiles you can select through the display menu.
MPPT controllers cost more but extract 20-30% more energy than PWM types, especially in cold weather or when panel voltage significantly exceeds battery voltage, making them worthwhile for most off-grid installations.
Step 6: Connect the Inverter and AC Distribution
Mount your inverter as close to the battery bank as possible, ideally within 10 feet, to minimize voltage drop on the DC side. Choose a location with adequate ventilation since inverters generate heat during operation, and ensure it’s protected from moisture.
Connect heavy-gauge cables from your battery bank’s positive and negative terminals to the corresponding DC input terminals on the inverter. Most off-grid systems require 2/0 or 4/0 AWG cable for this connection. Install an appropriately sized DC disconnect switch and fuse or breaker between the batteries and inverter for safety, this lets you isolate the inverter for maintenance and protects against overcurrent situations.
On the AC output side, wire the inverter to either a critical loads subpanel (which powers only essential circuits) or a dedicated AC distribution panel. This step often requires a licensed electrician to ensure code compliance. The inverter’s AC output connects to this panel just as utility power would.
Establish proper grounding throughout by connecting the inverter’s grounding terminal to your system’s grounding rod using 6 AWG copper wire minimum. Ground both the DC negative and AC neutral according to your inverter’s manual, grounding requirements vary between different inverter models and can affect system safety and performance.
Testing and Verification: Ensuring Your System Works Correctly
Before flipping the switch on your new off-grid solar system, systematic testing prevents dangerous mistakes and ensures reliable performance. Start with the solar array disconnected from everything else and use a multimeter to measure open-circuit voltage from your panels. On a sunny day, you should see voltage readings that match or slightly exceed the manufacturer’s specifications, typically 18-22V per standard panel. Verify polarity by checking that positive and negative terminals align correctly throughout your system; reversed connections can destroy expensive components in seconds.
Next, check your battery bank voltage with all loads disconnected. A fully charged 12V battery should read 12.6-12.8V, a 24V bank around 25.2-25.6V, and a 48V system approximately 50.4-51.2V. These resting voltages confirm your batteries are healthy and properly connected. Connect your charge controller, then your solar panels, watching the controller display to verify it recognizes both components and begins the charging cycle. Most controllers show incoming solar voltage, battery voltage, and charging current, all three readings should be present and changing as the sun moves.
With the charge controller working, connect your inverter and measure its output with a small test load like a lamp. You should see a steady 120V AC (or 240V for larger systems). Turn the inverter on and off several times, listening for unusual sounds and checking that it powers up smoothly each time.
Monitor your first full charge cycle by observing battery voltage rise throughout the day, then plateau as the controller switches to float mode, typically around 13.6V for a 12V system. If voltage keeps climbing above 15V or never reaches absorption voltage, your controller settings may need adjustment for your battery type. Watch overnight discharge with typical loads running; voltage should drop gradually, not plummet. A sudden voltage drop suggests undersized batteries or a wiring problem drawing excessive current.
Common startup issues include tripped breakers from incorrect wire sizing, controllers displaying error codes due to mismatched voltage settings, and inverters that won’t start because battery voltage is too low. Most problems trace back to loose connections, incorrect polarity, or configuration settings that don’t match your equipment. Recheck every connection point, consult your component manuals for proper settings, and don’t energize the full system until each subsystem tests correctly on its own.
After Installation: Maintenance and Next Steps
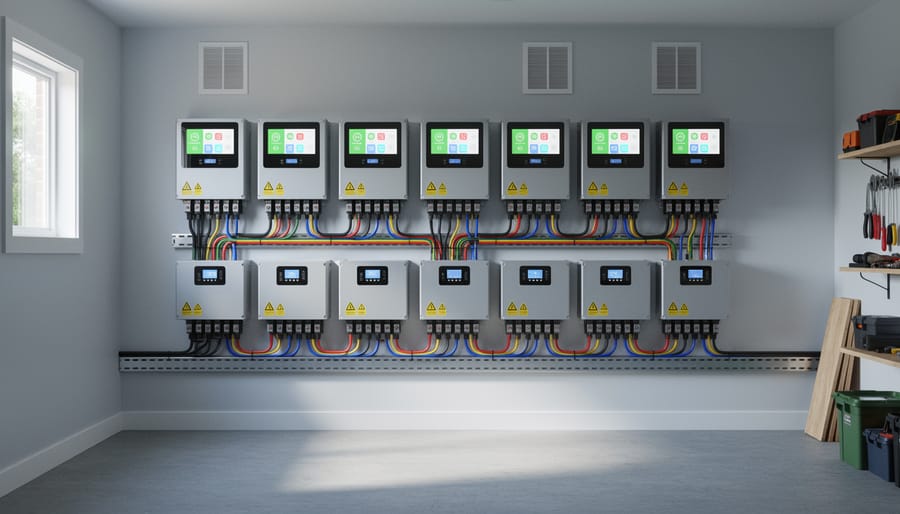
Your off-grid solar system will serve you reliably for decades with proper attention, but unlike grid-tied systems, you can’t ignore maintenance and expect consistent performance. The batteries, charge controller, and inverter all need periodic checks to prevent small issues from becoming expensive failures.
Establish a regular maintenance routine from day one. Monthly tasks include visual inspection of all electrical connections for corrosion or looseness, checking battery terminals for buildup, and reviewing your system’s performance data to catch declining output early. Clean your solar panels whenever you notice visible dirt, pollen, or bird droppings, dusty panels can lose 20-25% of their efficiency. In Pennsylvania, seasonal cleaning after spring pollen season and before winter is usually sufficient for roof-mounted arrays, though ground-mounted panels may need more frequent attention.
Your maintenance schedule should include:
- Monthly: Check battery voltage and electrolyte levels (flooded lead-acid batteries), inspect all visible connections, review charge controller logs
- Quarterly: Clean solar panels, test ground fault protection, verify inverter error codes and settings
- Biannually: Torque-check all electrical terminations, inspect racking hardware for rust or loosening, clear vegetation around ground mounts
- Annually: Load-test battery bank capacity, inspect conduit and wire insulation, verify charge controller calibration
Battery maintenance demands the most attention. Flooded lead-acid batteries require monthly water top-offs with distilled water and equalization charging every few months. Sealed AGM or lithium batteries need less hands-on care but still benefit from capacity testing and temperature monitoring.
Consider expanding your system as your energy needs grow or as you embrace a more sustainable lifestyle that includes electric vehicles or additional appliances. Most off-grid systems can accommodate extra panels or battery capacity without major redesign. Plan upgrades during your lowest-demand season, and replace your oldest batteries first when adding storage capacity to avoid mixing battery ages within the same bank.
Pennsylvania Success Story: Off-Grid Solar in Rural Lancaster County
When the Zimmerman family decided to build their homestead in rural Lancaster County in 2024, they committed to complete energy independence from day one. Their 4.8kW off-grid solar system now powers a 1,200-square-foot home, workshop, and small dairy operation.
“The biggest surprise was realizing we needed twice the battery capacity we initially planned,” Sarah Zimmerman explains. Their first winter taught them that Pennsylvania’s short December days meant relying heavily on stored power. They expanded from eight to sixteen 6V deep-cycle batteries, giving them three days of backup capacity during extended cloudy periods.
The family faced two major challenges during installation. First, their sloped metal roof required custom mounting brackets they fabricated themselves after realizing standard hardware wouldn’t work. Second, local building codes required a licensed electrician to sign off on their inverter and AC distribution work, even though they handled most installation tasks themselves.
Their solution for Pennsylvania winters? A small propane generator that runs roughly ten hours per month during the darkest weeks. “It’s not pure off-grid, but it’s realistic,” Tom Zimmerman notes. The generator cost $800 but eliminated the need for $3,000 worth of additional solar panels that would sit mostly idle nine months of the year.
Two years in, their system has performed beyond expectations, with panels producing 15% more power than projected thanks to careful southern orientation and minimal shading.
Common Questions About Off-Grid Solar Installation
Do I need a permit to install an off-grid solar system?
Most jurisdictions require building and electrical permits even for off-grid systems, particularly if you’re making structural changes or working with high-voltage equipment. Contact your local building department before starting to understand specific requirements in your area.
How long will my off-grid solar system last?
Solar panels typically carry 25-year warranties and can produce power for 30+ years, though efficiency gradually decreases. Batteries need replacement every 5-15 years depending on type and usage, while inverters and charge controllers usually last 10-15 years.
Can I realistically install an off-grid system myself?
A motivated homeowner with electrical experience can handle much of the installation, but most people hire a licensed electrician for final connections and inspection compliance. The physical work of mounting panels and racking is manageable for anyone comfortable with basic construction, but DC wiring requires careful attention to safety protocols.
Will my system work during Pennsylvania winters?
Off-grid solar systems absolutely work in winter, though you’ll generate less power due to shorter days and lower sun angles. Size your battery bank large enough to carry you through cloudy stretches, and consider keeping snow cleared from panels after storms to maintain production.
Many homeowners wonder about backup generators for their off-grid setup. A small propane or diesel generator serves as excellent insurance during extended cloudy periods, particularly in winter. You can size it much smaller than you’d need for a conventional backup system since you’re just supplementing solar rather than powering your entire home.
The decision to go off-grid represents more than personal energy independence. It’s a tangible step toward building cleaner communities and reducing reliance on fossil fuel infrastructure. While the upfront investment runs higher than grid-tied systems, eliminating monthly electric bills and gaining complete energy autonomy appeals to homeowners ready to take control of their power supply.
Installing an off-grid solar home system is absolutely achievable for motivated homeowners who follow the right process. Yes, it requires planning, patience, and careful attention to safety, but thousands of families across Pennsylvania and beyond have successfully made the transition to energy independence. The environmental benefits alone, eliminating your carbon footprint from grid electricity, reducing reliance on fossil fuels, make this investment worthwhile for our planet’s future. Financially, you’re protecting yourself from rising utility rates while building long-term resilience.
Starting can feel overwhelming, but breaking the project into clear steps makes it manageable. Begin with your energy audit and system sizing calculations this week. Research local permits and connect with experienced installers if you need guidance. Every sustainable choice matters, whether it’s off-grid solar or joining broader efforts like what Pennsylvania can do to protect our environment. Energy independence isn’t just possible, it’s your path to a more sustainable, self-reliant future.